coffee

Iced Coffee, an Update

It’s summer, and I’m left like some other southerners who enjoy coffee contemplating how best to get my cuppa’ joe fix without having to drink something hot.   While frappes and similar drinks are tasty, they’re not usually economical or kind to my waistline.   Making them at home is doable, but not as mindlessly simple as firing up the coffee pot.   Enter Iced Coffee.

If you’ve read my blog previously, you may remember my post in early May about making your own Iced Coffee.  The results were well worth the moderate effort, and no special equipment was needed, short of a large pitcher and some cheesecloth.   Thanks to discussion of this concept with a good friend and connoisseur of all things coffee, I’ve revised the process a bit for something that works exceptionally well and the cleanup is quick.   It does require the purchase of one specialty item that can be purchase for about $7 on Amazon.  (For those like myself who don’t live in a huge metro area, the internet has made getting quirky kitchen gadgets a lot less work.)   That specialty item is a nut milk bag.   In a nutshell (pun intended) it’s reusable cheesecloth, stitched up to make a bag shape.    There’s a number of them to choose from online, but for the price, I think this one does a pretty good job.

Pitcher of Iced Coffee, brewing via cold brew

Pitcher of Iced Coffee, brewing.

So to revisit and revise what I did previously, let’s look at the previous recipe.   It started with adding 6-8oz of coffee to the pitcher, and filling it with water.  Wait several hours, then use a cheesecloth lined strainer to slowly strain the liquid goodness through, leaving the grounds behind.   That works, but admittedly it can get a bit messy.   I’ve tried since then other ways to improve on the process.  Then my friend came across the idea on LifeHacker to try this technique with the bag.   After a couple of tries, I’ve made some tweaks and I think I have it down to a way to easily and satisfactorily make iced coffee, with minimal fuss and cleanup.

Just as before, you’ll need some ground coffee.   I use about 3 to 4 oz.   Also you’ll need a 2 1/2 quart pitcher (or larger), water, and your nut milk bag.  Fill the pitcher with about 2 quarts of water.   Place the bag in the top of the pitcher, with the top open.   You can use the pitcher sides to help keep the bag open.   Measure out 3 to 4 oz of your ground coffee and pour it into the bag.   Close the bag and place the lid on top to hold the bag in place.  (Mine has a draw string, so I drape it out of the pitcher and use the lid to secure it.)

Set the pitcher somewhere out of the way.  Wait as little as 8 and up to 24 hours, depending on how strong you like your iced coffee.   I usually let to sit for about 12 hours.

Iced Coffee

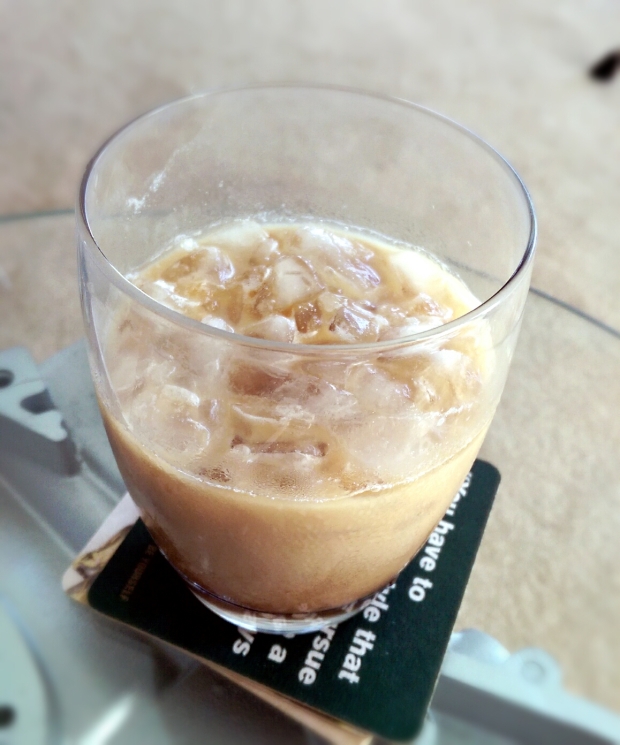
Iced Coffee – how to get your coffee fix in the heat of summer.

When you simply can’t stand it any longer, carefully remove the bag from the pitcher.   Discard the grounds, or use them in your garden/composting.

Depending on how willing you are to tolerate very fine grounds and how good the nut milk bag is at filtering the grounds, you may want to filter the coffee a bit further.   If so, you likely already have the perfect device for filtering it – your coffee maker.   Put a filter in the basket and slowly pour the iced coffee into the basket, letting it drain into the coffee pot as you go.  This may take a few minutes but if you want to avoid the grounds entirely, this is a simple way to do it.   Plus the only cost is a single coffee filter.

Refrigerate the coffee once you’ve filtered it to your satisfaction and once it’s chilled, pour yourself a glass.    I suggest you try the same ratios as before – 1/2 glass of ice, cover the ice with coffee, then top off with cream & sugar, or your favorite coffee creamer, either to taste.

Looking for the original recipe?  Get it here.


Iced Coffee

Iced Coffee, Done Right

I like coffee.  As much of an admitted foodie as I am, it’s been a very gradual process to start drinking it.   Honestly it’s a somewhat recent development and a surprise to those that have known me for a long time, as I would wrinkle up my nose and leave the room at the smell of it, much less consume it in any form.   Then, as fate would have it, on a long road trip a few years ago I needed a boost of energy.   Our train of cars stopped for a stretch and snack break at a McDonald’s and I decided to get one of their frappe beverages.   So yes, my first coffee consumption was from McDonald’s.  Don’t judge me.   I had to start somewhere!   I wasn’t keen on the flavor, but the milk, ice, whipped cream, and caramel sauce covered up a lot of the coffee and I managed to drink it all.  Plus I really needed to wake up for the drive.

So fast forward a few years and now I’ve become a once-a-day some-sort-of-coffee-product person.  Usually in the morning, and I still can’t drink it black.   My husband would argue that I’m not entirely a coffee drinker yet, as I do require a liberal amount of cream and sugar.   It is a process, so maybe in a few years I’ll be drinking it straight up.  Who knows.

Since we’re going into summer, I like my coffee in some cold form, and I’ve been looking for a while for a good way to make frappes and iced coffee.   While it’s possible to brew coffee and simply pour it over ice, anyone who has tried it will tell you that the watered down end result is just not all that good.     I suspected that most coffee shops use either espresso or a coffee concentrate of sorts.   Something strong, so it could stand up to the ice and milk.    In my research, I stumbled onto the idea of a slow, cold brew.    I found a blog entry from The Pioneer Woman, with a recipe for the Perfect Iced Coffee.   Her idea was excellent!  However it sounded like it would make enough coffee concentrate to last a month or more, and that’s with both my husband and I drinking it daily.    Time to…wait for it…. HALF the recipe!


Cold Brewed Coffee Concentrate

Ingredients / Tools Needed
6 to 8 ounces ground coffee, choose your favorite
1 gallon water (4 quarts for the math challenged)
Cheesecloth
Fine mesh strainer
1 gallon container (or slightly larger if you have it)
a BIG pitcher – 1 gallon or close to it – for storing the end result coffee

Instructions
Start by pouring the 1/2 pound of coffee into the large container.   Add 1 gallon of water, about 2 quarts at a time.  Stir to make sure the coffee is distributed throughout, although it will settle later.
Put a lid on the container or cover it and set it aside at room temperature for at least eight hours.  Longer if you want; the longer it sits, the stronger the concentrate.

After you can’t wait any longer, but you’ve been patient enough to wait at least eight hours, open the container.   Place a double-thick layer of the cheesecloth over the strainer, and put that over the pitcher or a large bowl.   Scoop off any coffee grounds that have floated to the top of the container and let them drain through the cheesecloth/strainer.   Discard the grounds (or use them in your landscaping).   Pour the coffee concentrate through the cheesecloth/strainer into the pitcher or bowl until you get near the bottom, where more grounds likely will have settled.  You can decide if you want to put the last of the grounds into the strainer to get every last drop of coffee, or just discard the remainder.

Chill the coffee concentrate for an hour or so before using.


How to use the coffee to make Iced Coffee:

This is how I make my iced coffee using the concentrate described above.

image

Start with a glass 1/2 full of crushed ice.


image

Add coffee creamer like you would any other cup of coffee in the same quantity.  Stir.


image

Add milk to fill the glass.  Stir.

Sit back and enjoy your tasty iced coffee!


What makes this concept and recipe so great is that it makes enough concentrate for a week or more, depending on how much coffee you drink and how often.  For just me, it would probably be enough for about two weeks.  For a couple who both drink it once a day, it’s about a week.

It’s also nice alternative when you want coffee in the summer but not a hot beverage.

To me two of the biggest benefits are how this can be customized to any taste and it’s very inexpensive.   The original recipe from The Pioneer Woman blog suggests using sweetened condensed milk.  Sounds delicious and just a wee bit high calorie for my waistline.   My husband and I got on a kick one evening experimenting with the combinations of milk, cream, simple syrup, coffee creamer, and even chocolate syrup.   The chocolate syrup was a good for a sweet treat, but the overall winner for me was a combo of coffee creamer and milk.   The creamer gives it that creamy texture and sweetness, while the skim milk made it more filling.  As for cost,  a Starbucks iced coffee in the smallest size starts at about $2.  So at $4 for a half pound of good coffee, which will make enough concentrate for easily a dozen or more iced coffees, the savings is pretty substantial.   That’s not accounting for the milk and/or sweetener you may add, but since that varies and you’re not using a lot, it still adds up to a lot less money.

For those like me who prefer to be able to pronounce most of what they eat or drink, this recipe gives you total control over what goes in your iced coffee.  I’m a bit picky about ingredients, to the point I’m one of those annoying folks standing there reading a label at the grocery store.  (Actually I’ve done it long enough I can know pretty quick if it’s something I’m going to buy or put back on the shelf.)

If you’re having to run out the door and grab your coffee on the go, this recipe works great!  It requires so little time to assemble, so you can be armed with your iced coffee and ready to tackle the world in far less time than you’d spend at the drive-thru.   (And you’ll save money.)

So in short, this recipe is:

  • Incredibly Easy
  • Inexpensive
  • Uses ingredients you likely already have
  • Makes enough for a week, or something similar
  • Tastes great
  • Saves time on busy mornings
  • Saves money compared to buying them at the coffee shop

All that adds up to a winner in my book.   Hope you enjoy it as much as I do!